Have you ever looked at a silver ring and wondered, "How did they make that?" It might look like magic, but silversmithing is actually a beautiful blend of art, science, and patience.
In our Ubud Bali Silver Class, we teach the traditional methods that have been passed down for generations in Bali. If you are planning to join us, or just curious about the craft, here is a step-by-step guide to what happens in our studio.
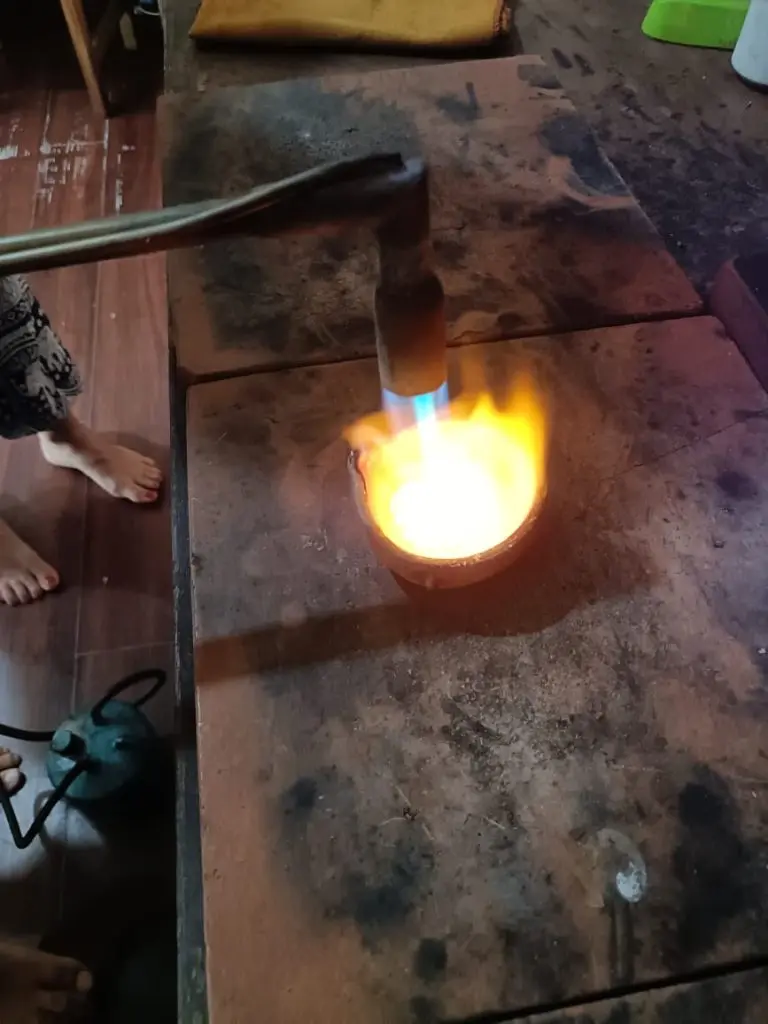
Step 1: The Transformation (Melting)
It all starts with raw silver grains. To make them usable, we must melt them down. We place the silver in a crucible and heat it with a torch until it becomes a glowing, fiery orange liquid. This molten silver is then poured into a mold to form a small bar or rod.
Step 2: The Workout (Rolling & Shaping)
The silver bar is too thick to be jewelry yet. We use a machine called a Rolling Mill to press the silver. By passing it through the rollers again and again, we turn that thick bar into a thin wire or a flat sheet, depending on your design. This prepares the "canvas" for your art.
Step 3: The Art (Design & Form)
This is where your creativity comes in. Using pliers, hammers, and files, you will shape the wire. You might twist it to create a rope pattern, hammer it to add texture, or bend it into a perfect circle for a ring. It requires a steady hand, but don't worry—our instructors are there to help guide every movement.
Step 4: The Fire (Soldering)
How do we connect the ends of a ring? We can't use glue! We use a technique called Soldering. We place a tiny piece of silver solder on the joint and heat it with fire. The solder melts and fuses the two pieces of metal together permanently. Watching the silver "flash" as it bonds is the most satisfying part of the process.
Step 5: The Reveal (Polishing)
When the ring is finished soldering, it looks dull and dark from the heat. The final step is polishing. We use sandpaper and a polishing machine to remove scratches and bring out the brilliant, mirror-like shine of the Sterling Silver.
Conclusion
And just like that, you have turned raw metal into a beautiful piece of jewelry. It sounds complex, but with the right guidance, anyone can do it in just 3 hours.
Want to try these steps yourself?
There is no feeling like holding a ring you made with your own hands.
Book Your Experience